As I mentioned previously, this site was put together using Pelican - a static site generator, written in Python.
Static site generators take your content, pour it into your templates and output the result as static pre-generated HTML, CSS, JS & image files. You can then just upload the resulting folder of output to your server and you’re done. All you need on the server is a web server of some sort, like Apache or Nginx - anything really - all it’s doing is serving static pages.
The huge advantage of this setup is simplicity:
- You can write your content in Markdown [1], reStructuredText [2] or AsciiDoc [3] - all simple text formats, designed to facilitate writing and get out of your way. You can use whichever writing tool you prefer [4], as long as it can output plain text files.
- Whenever you make changes, Pelican can automatically regenerate the site, so you can see your changes immediately.
- When you’re done, Pelican can automatically upload the site to your web server, or you can do it, just by uploading a folder.
- The web server generally requires no setup - all you need is a web server that can serve static content (which is all of them) - no extra software or configuration; no PHP, no database, no nothing - much less to go wrong.
- Because you’ve only got one thing running on the server, you have much less exposure to security problems - no WordPress, no PHP - just the OS & the web server.
- Because the server is only serving pre-generated static content, a Pelican site is very lightweight, using very few server resources.
NB: This tutorial is quite long. I go into detail, explain things and try to take you from zero to a complete, fully functional website, built the way a professional web developer would do it. If you just want a really quick Pelican jump start, try here: http://docs.getpelican.com/en/latest/getting_started.html
Installation & Basic Setup
I’m using Linux (Xubuntu), but doing this on Windows or Mac is quite similar - you’ll need the same things installed, but the details of installing them will be different. Installing python-dev and python packages that want to build C extensions on Windows… won’t work - I suggest you give ActiveState’s Binary Package manager a try if you’re on Windows.
Where I use duncanlock in the examples below, you should use your site name instead.
Install
Pelican uses Python, so you’ll need that installed. If you’re on Mac or Linux, you’ll already have this, but you’ll probably need to install it on Windows. Pelican supports Python 2.7.x or 3.3+, so use whichever you prefer. I’m doing this using Python 2.7.3, but I think everything should be the same on 3.x, although I haven’t tried it.
First, I’m going to install pip [5], virtualenv [6] and virtualenvwrapper [7]. These tools make working on python projects much, much easier. Later, we’re going to install some python packages that will attempt to build their C extensions during install, so we also need python-dev:
$ sudo apt-get install python-pip python-virtualenv virtualenvwrapper
$ sudo apt-get install python-dev
Next, I’m going to tell virtualenvwrapper where I want it to put stuff, by adding this to my ~/.bashrc file:
# virtualenvwrapper config
export PROJECT_HOME=~/dev
export WORKON_HOME=~/dev/virtualenvs
Now close and re-open your terminal. This will trigger a one-time setup for virtualenvwrapper. Then run:
$ mkproject duncanlock.net-pelicanwhich should do something like this:
New python executable in duncanlock.net-pelican/bin/python
Installing distribute.........done.
Installing pip...............done.
virtualenvwrapper.user_scripts creating
[...]
Creating /home/duncan/dev/duncanlock.net-pelican
Setting project for duncanlock.net-pelican to /home/duncan/dev/duncanlock.net-pelican
You will now have a self-contained python virtual environment installed in ~/dev/virtualenvs/duncanlock.net-pelican and a new folder in ~/dev/duncanlock.net-pelican, to put your project files in. Your command prompt will change while this virtualenv is active - gaining a (duncanlock.net-pelican) at the beginning, so you know which virtualenv you’re in.
Next, we’re going to install Pelican and it’s dependencies into our virtual environment:
$ pip install pelicanThis should install the following things for you:
- feedgenerator
- to generate the Atom feeds
- jinja2
- for templating support
- pygments
- for syntax highlighting
- docutils
- for supporting reStructuredText as an input format
- pytz
- for timezone definitions
- blinker
- an object-to-object and broadcast signaling system
- unidecode
- for ASCII transliterations of Unicode text
It should print out a load of progress stuff and eventually finish by saying:
Successfully installed pelican feedgenerator jinja2 pygments docutils pytz blinker unidecode six
Cleaning up...
Double check it worked by running pelican --version - currently this should print out 3.2.0 - then run pip freeze - which prints out a list of the python modules installed in your current virtualenv.
Now we’ll install some extra python modules to support bonus functionality provided by some Pelican plugins that we’ll be using later:
$ pip install Pillow beautifulsoup4 cssmin cssprefixer cssutils pretty six smartypants typogrify webassetsAgain, as far as I know PIL/Pillow is hard to install on Windows - use the ActiveState Package Manager. Once this is done, run this to get pip to make a list of all the things you’ve got installed in this virtualenv:
$ pip freeze > requirements.txtWhich should create a text file containing something like this:
Jinja2==2.6
Pygments==1.6
Unidecode==0.04.12
argparse==1.2.1
blinker==1.2
docutils==0.10
feedgenerator==1.5
pelican==3.2
pytz==2013b
six==1.3.0
wsgiref==0.1.2
This allows you to re-install everything in one go if you move machines, just by running pip install -r requirements.txt – or to check for & install updates to all the modules at once, just by running pip install --upgrade -r requirements.txt, amongst other things. We’re also going to check this lot into git later and this allows you to keep the list of requirements under version control too, which is nice.
Pelican Quick Start
Now that we’ve got everything installed, run this to create a basic skeleton site for you to modify:
$ pelican-quickstartThis will ask you some questions and generate a skeleton site, that matches your answers:
Welcome to pelican-quickstart v3.2.0.

This script will help you create a new Pelican-based website.

Please answer the following questions so this script can generate the files needed by Pelican.

Using project associated with current virtual environment. Will save to:
/home/duncan/dev/duncanlock.net-pelican
you can accept the defaults by pressing enter for most of these questions, except these:
> What will be the title of this web site?
duncanlock.net
> Who will be the author of this web site?
Duncan Lock
If you wanted to use the built-in Pelican webserver for development, you could say ‘No’ and skip this next bit, but we’re going to configure a local virtualhost and use Apache to serve the site for development, so we’re going to do this instead:
> Do you want to specify a URL prefix? e.g., http://example.com (Y/n) y
> What is your URL prefix? (see above example; no trailing slash) http://duncanlock.test
[...]
Done. Your new project is available at /home/duncan/dev/duncanlock.net-pelican
Now you can generate the quick-start site and see what it looks like:
$ make htmlThis should create an output folder with the contents of a website in it. To quickly serve the generated site so it can be previewed in your browser, run this:
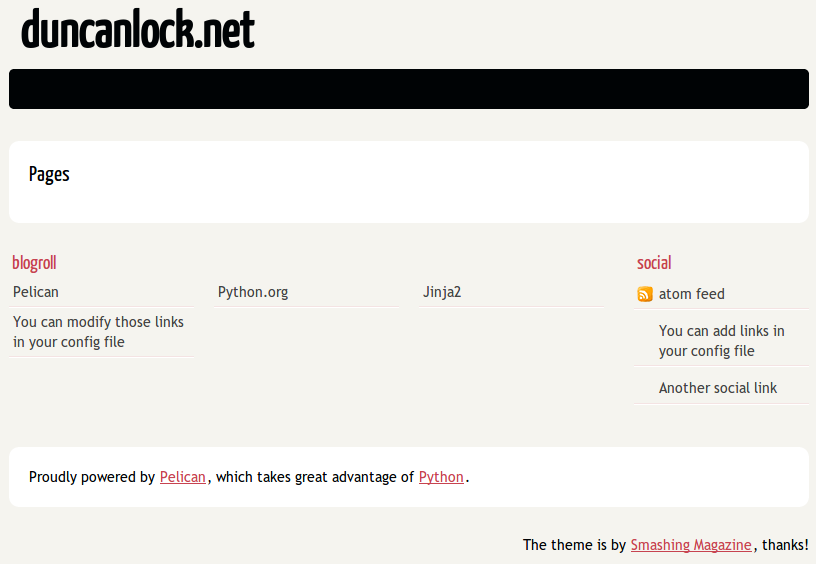
$ make serveThen visit http://localhost:8000 in your browser; you should be able to see a test site, which should look something like this:
Press Ctrl + c in the console to stop the Pelican server.
Apache Setup
Okay, now we want to configure an Apache VirtualHost [8], so that when we visit http://duncanlock.test/ in a browser, our local Apache server will serve up our local pelican development site. There are lots of reasons why this is useful, but the main one is that it’s very close to my final deployment environment - a Linux box with Apache on it. It also means that the root of the local site is /, the same as the root of the final live site, which is nice for making links work. This also allows us to do neat server configuration things and test them all locally, as we’ll see later.
If you haven’t already got Apache installed, install it:
$ sudo apt-get install apache2Once that’s finished, save the following as a text file called duncanlock.test in /etc/apache2/sites-available/:
# domain: duncanlock.test
<VirtualHost *:80>
    # Admin email, Server Name (domain name) and any aliases
    ServerAdmin webmaster@duncanlock.test
    ServerName  duncanlock.test
    ServerAlias www.duncanlock.test

    # Index file and Document Root (where the public files are located)
    DirectoryIndex index.php index.html
    DocumentRoot /home/duncan/dev/duncanlock.net-pelican/output/
</VirtualHost>
The really crucial bit of this is the DocumentRoot - make sure this points to the /output/ folder of the Pelican site we just created - and use an absolute path.
Then add a mapping for the duncanlock.test domain to your /etc/hosts file, by adding this line somewhere:
127.0.0.1 duncanlock.testThen enable our new virtual host in Apache:
$ sudo a2ensite duncanlock.test
$ sudo service apache2 reload
Now visiting http://duncanlock.test/ in a browser should show your local Pelican development site.
Git
It’s about time we started keeping some history of what we’re doing, so we will add our work so far to git [9] - a version control system that will keep a history of all our changes, allow easy backups and restore, moving between machines, rolling back changes - and much more.
First, create a text file called .gitignore in your website’s root folder, containing this:
output/*
*.py[cod]
This tells git to ignore everything in the output folder, and any compiled python files - we don’t need to version or backup that stuff.
Next, turn the current folder into a git repository and add our site so far:
$ git init

Initialized empty Git repository in /home/duncan/dev/duncanlock.net-pelican/.git/

$ git add .
$ git status

# On branch master
#
# Initial commit
#
# Changes to be committed:
#   (use "git rm --cached <file>..." to unstage)
#
#   new file:   .gitignore
#   new file:   Makefile
#   new file:   develop_server.sh
#   new file:   pelicanconf.py
#   new file:   publishconf.py
#   new file:   requirements.txt
#

$ git commit -m"Inital commit of duncanlock.net; quick start site with no changes, so far"
$ git status

# On branch master
nothing to commit, working directory clean
That’s it - the site is now in git, ready to be backed up onto GitHub, if you like. When you make changes, remember to do the following, so they’re stored and versioned in git:
$ git add .
$ git commit -m"Description of the changes I made."OK, that’s it for part one - you should now have a working Pelican site, in a python virtual environment, being served by Apache via a VirtualHost on your local machine.
Coming up in Part 2:
- Content creation work-flow
- Creating & customizing your theme
- Custom Jinja filters
- Configuring your Pelican site
- Date based post URLs:
/blog/2013/05/03/post-title-goes-here/ - Plugins
- Extra files to copy over
- Twitter Cards
- Favicons, sitemaps, Google Analytics,
- etc…
- Date based post URLs:
- Performance: Web assets - minifying & compressing things, professional Apache .htaccess setup
- Deploying your site to your server
Once I’ve finished part 2, I’ll link it here. If you’ve got any questions, please ask in the comments.
Footnotes & References:
- *Markdown* is a text-to-HTML conversion tool for web writers. Markdown allows you to write using an easy-to-read, easy-to-write plain text format, then convert it to structurally valid XHTML (or HTML): http://daringfireball.net/projects/markdown/ ↩
- *reStructuredText* is an easy-to-read, what-you-see-is-what-you-get plain text mark-up syntax and parser system. It is useful for in-line program documentation (such as Python docstrings), for quickly creating simple web pages, and for standalone documents: http://en.wikipedia.org/wiki/ReStructuredText ↩
- *AsciiDoc* is a text document format for writing notes, documentation, articles, books, ebooks, slideshows, web pages, man pages and blogs. AsciiDoc files can be translated to many formats including HTML, PDF, EPUB, man page: http://www.methods.co.nz/asciidoc/ ↩
- *SublimeText* is currently my favourite text editor - it’s really pretty great, you should try it. ↩
- *Pip* is a package management system used to install and manage software packages written in the programming language Python. Many packages can be found in the Python Package Index (PyPI): http://en.wikipedia.org/wiki/Pip_(Python) ↩
- *virtualenv* is a tool to create isolated Python environments: http://www.virtualenv.org/en/latest/ & http://www.clemesha.org/blog/modern-python-hacker-tools-virtualenv-fabric-pip/ ↩
- *virtualenvwrapper* is a set of extensions to Ian Bicking’s `virtualenv` tool. Includes wrappers for creating & deleting virtual environments and managing development workflow, making it easier to work on more than one project at a time without introducing conflicts in their dependencies. http://virtualenvwrapper.readthedocs.org/en/latest/ ↩
- The Apache Webserver can serve lots of different websites from the same server instance, on the same IP address. Virtual Hosts are the way it does this. You just give each one a name, a folder and a mapping in your /etc/hosts files and reload Apache. ↩
- *Git* is a free and open source distributed version control system designed to handle everything from small to very large projects with speed and efficiency: http://git-scm.com/ ↩